The Aluminium Case
Every keyboard needs a case; ideally made of Aluminium or other types of metal. It’s way more beautiful than plastic, and the extra weight creates a better feeling.
The case for a keyboard can quickly hit the price you plan to invest in keycaps. Using a so-called Sandwich Case is a perfect mix. You get Aluminium, but don’t have to pay a fortune. The origin of the naming is obvious: There is one piece of Aluminium above your circuit board and one underneath. Both plates are connected with standard hexagonal standoffs and the cover plate holds the switches and stabilizers.
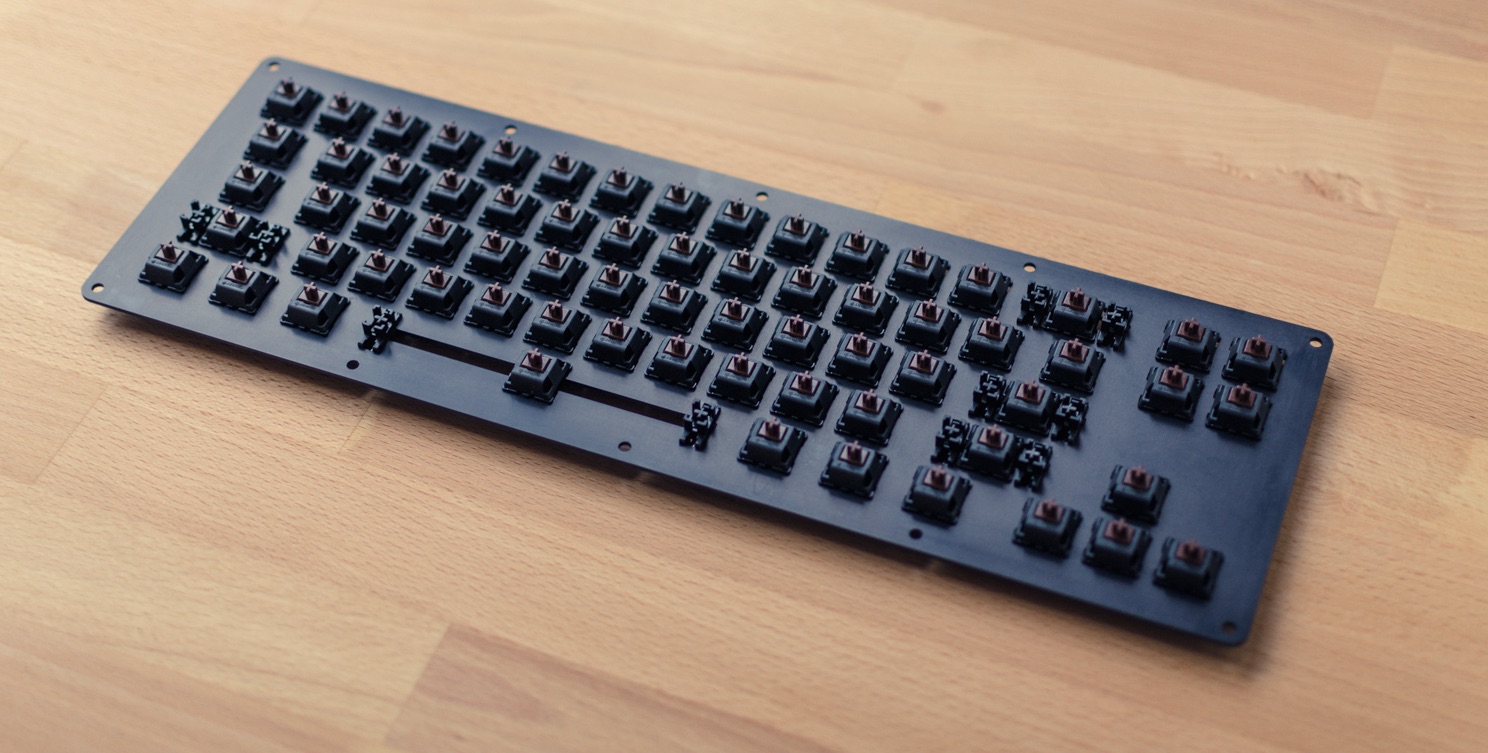
You just need a CAD file for both plates and submit them to a company that cuts your lines into a beautiful plate of Aluminium. Sounds complex, right? Don’t be afraid! You can find everything you need with a few clicks and submit the files into production within a minute.
Keyboard Layout with 68 Keys
First, let’s head over to the excellent Keyboard Layout Editor. The tool by Ian Prest is great to create layouts for any keyboard and exports them to an open format readable by other tools.
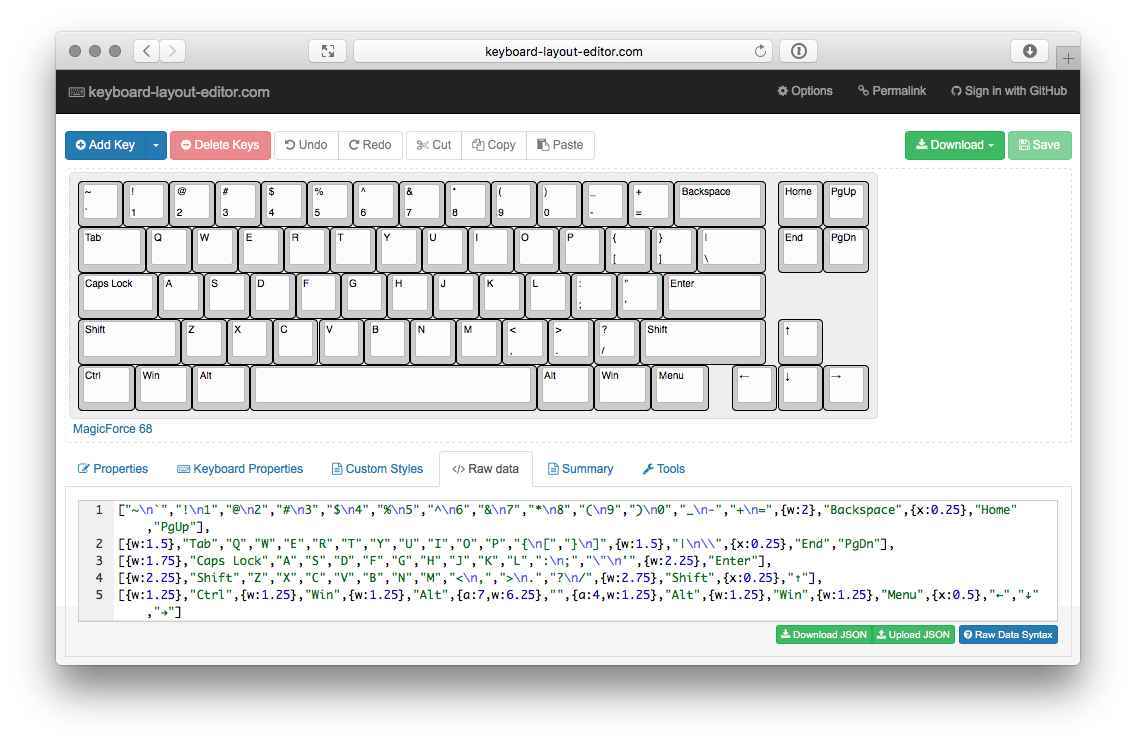
If you use the link to the editor from above, you are already good to go and no further actions are required. You can access the needed data using the Raw data menu, it looks like this:
["~\n`","!\n1","@\n2","#\n3","$\n4","%\n5","^\n6","&\n7","*\n8","(\n9",")\n0","_\n-","+\n=",{w:2},"Backspace",{x:0.25},"Home","PgUp"],
[{w:1.5},"Tab","Q","W","E","R","T","Y","U","I","O","P","{\n[","}\n]",{w:1.5},"|\n\\",{x:0.25},"End","PgDn"],
[{w:1.75},"Caps Lock","A","S","D","F","G","H","J","K","L",":\n;","\"\n'",{w:2.25},"Enter"],
[{w:2.25},"Shift","Z","X","C","V","B","N","M","<\n,",">\n.","?\n/",{w:2.75},"Shift",{x:0.25},"↑"],
[{w:1.25},"Ctrl",{w:1.25},"Win",{w:1.25},"Alt",{a:7,w:6.25},"",{a:4,w:1.25},"Alt",{w:1.25},"Win",{w:1.25},"Menu",{x:0.5},"←","↓","→"]
Files for Your Aluminium Case
The Plate & Case Builder by Will Stevens generates CAD files based on the exported raw data from the Keyboard Layout Editor. Just paste your keyboard layout into the Plate Layout field and configure the plates.
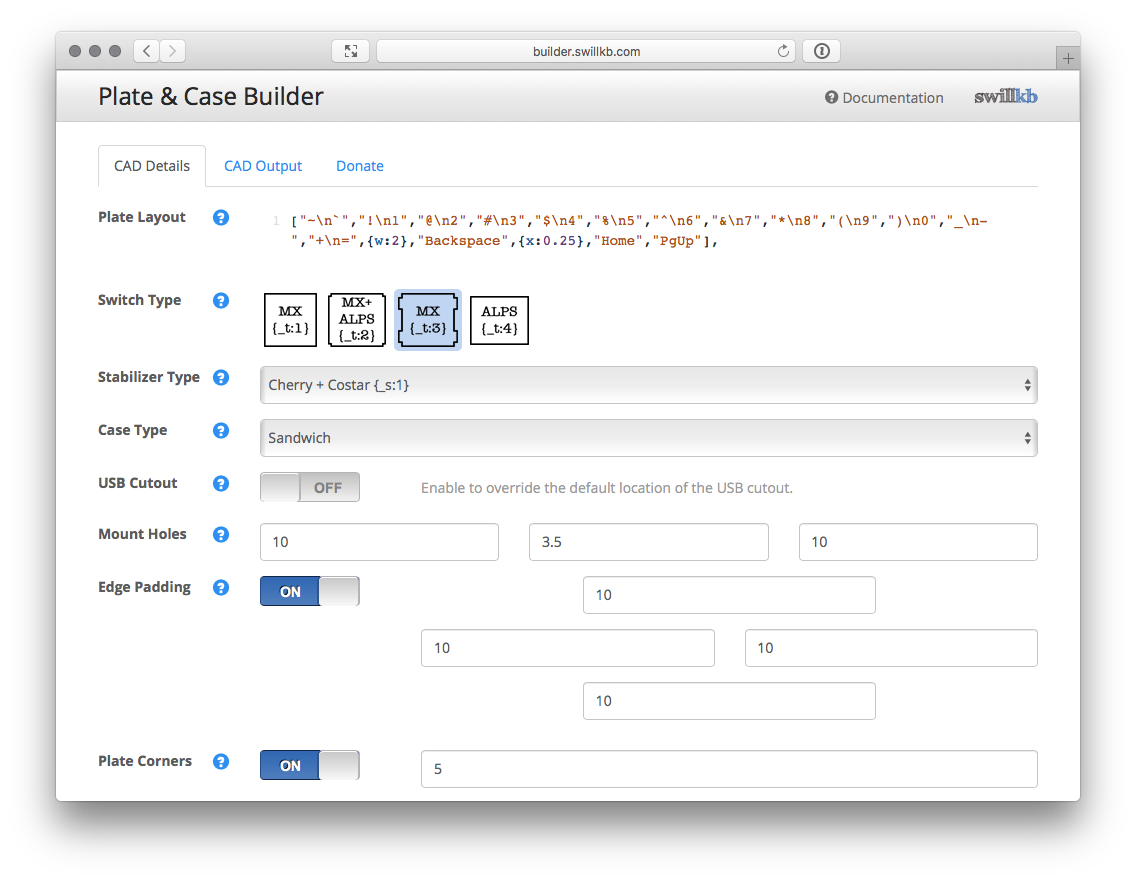
Make sure to select MX as the layout for the switches if you plan to use Cherry MX switches for your keyboard. If you use Cherry switches, you will use Cherry stabilizers as well. Adjust the values for Case Type, Mount Holes, Edge Padding, and Plate Corners, and you should be fine.
Switch Type:      MX {_t: 3}
Stabilizer Type:  Cherry + Costar {_s: 1}
Case Type:        Sandwich
Mount Holes:      10 / 3.5 / 10
Edge Padding:     Yes, 10 / 10 / 10 / 10
Plate Corners:    Yes, 5
After adjusting the configuration, you can generate the CAD files. The Plate & Case Builder will take a few seconds and present you a preview of the generated files. For the basic case, all you need are the Switch Layer and Bottom Layer files.
You can download the files with the needed configuration here, but you should use the builder to get a preview of what you are about to order.
Aluminium Cover
DXF, 125 kb
Aluminium Bottom
DXF, 25 kb
After downloading both files, you can close the Plate & Case Builder, as well as the Keyboard Layout Editor. The two DXF files are all you need for the next step.
Ordering Aluminium Case
It’s time get your credit card ready! Everything you need to do next is submitting both files to a company specialized in laster-cutting Aluminium. Most information to order the plates are combined in the downloaded files. You just need to configure the thickness of the Aluminium plates.
Cover:    1.5mm
Bottom:   3.0mm
The cover plate must be 1.5mm to fit the Cherry MX switches. The bottom plate can be thicker; this adds a few extra grams to your case! I doubled the thickness of the cover plate for the bottom one:
Do you know companies that do this job for a reasonable price? Please let me know. Do you work for a company that offers laser-cutting of Aluminium and you can provide a discount code? I would love to feature your business and services here!
Prepare Case Plates
If you did not pay for extra cleaning after cutting, chances are high you will need to clean both plates after you received them. They may have a plastic cover and some marks from the laser. You can just peel off the plastic and use a wet cotton towel to clean them.
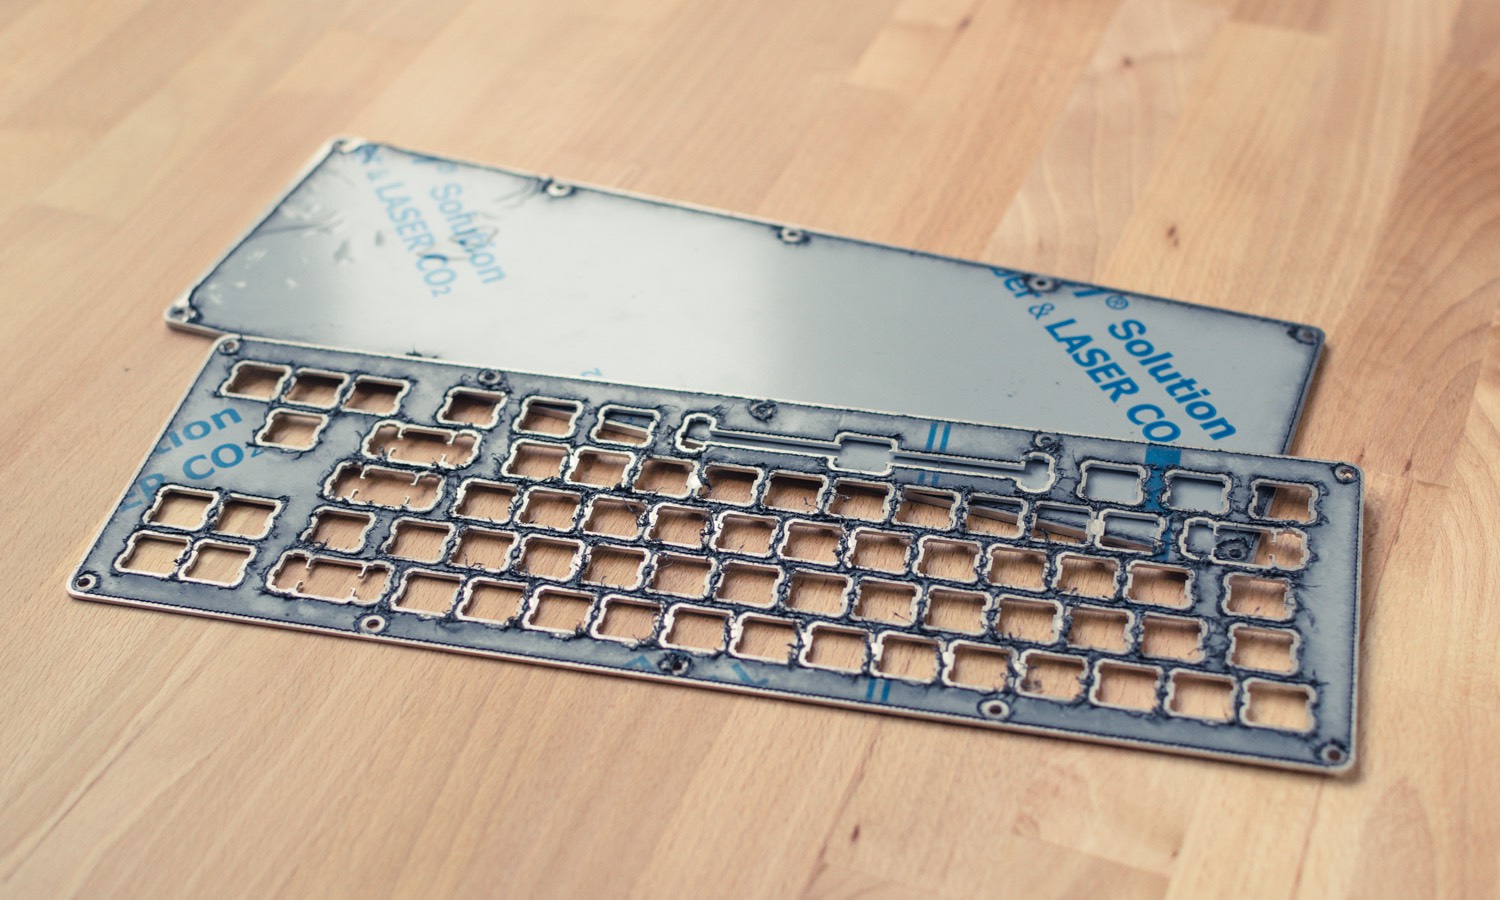
You should find regular Aluminium polish cream in your local hardware store. Together with the cotton towel you can polish the plates and have a shiny sandwich case for your keyboard.
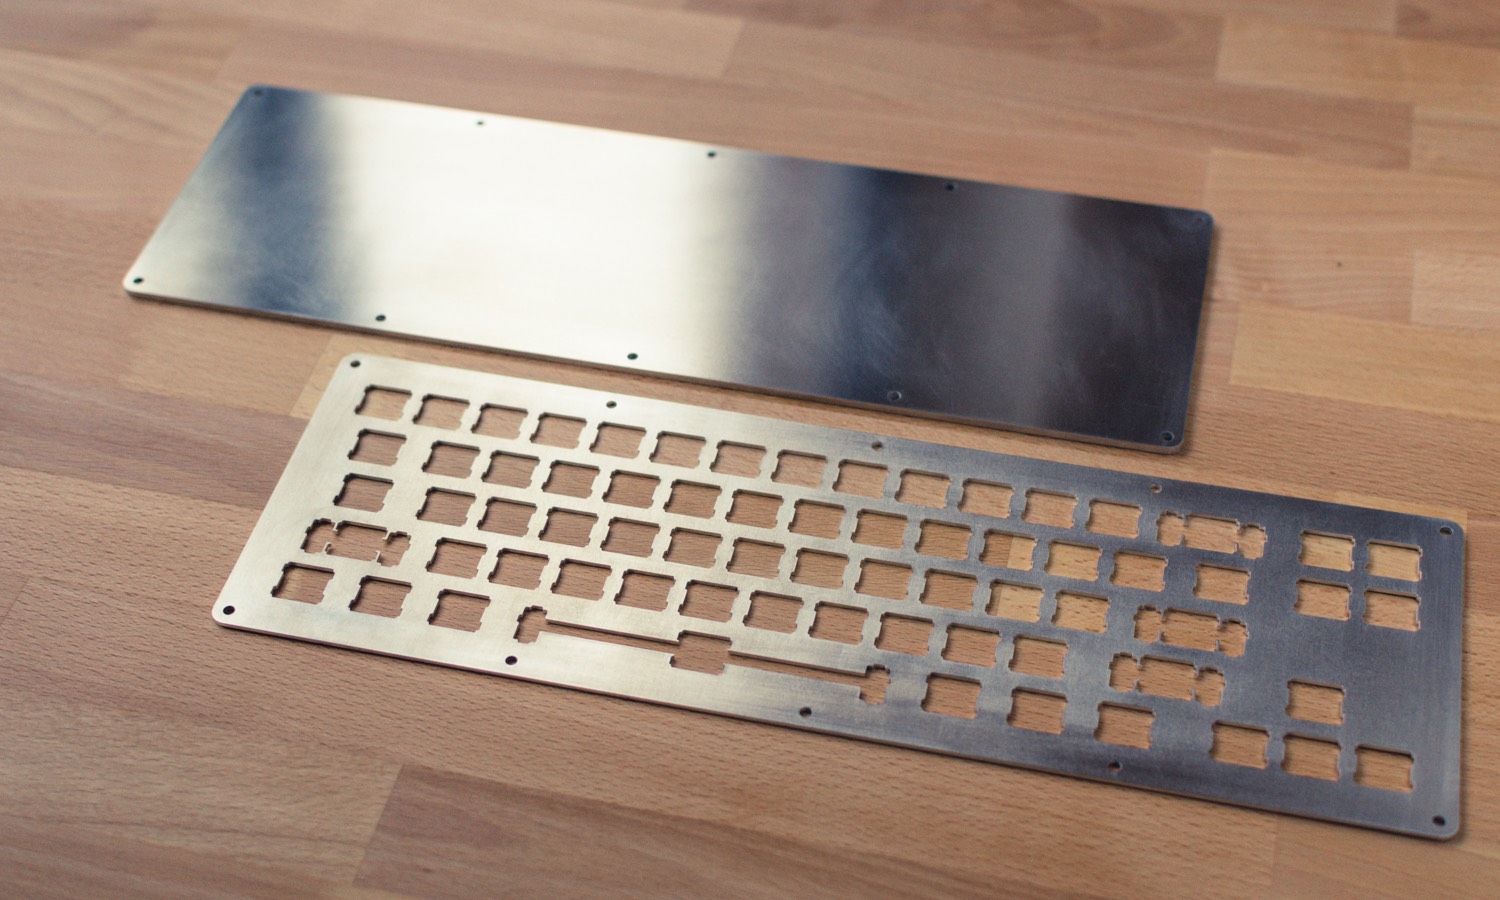
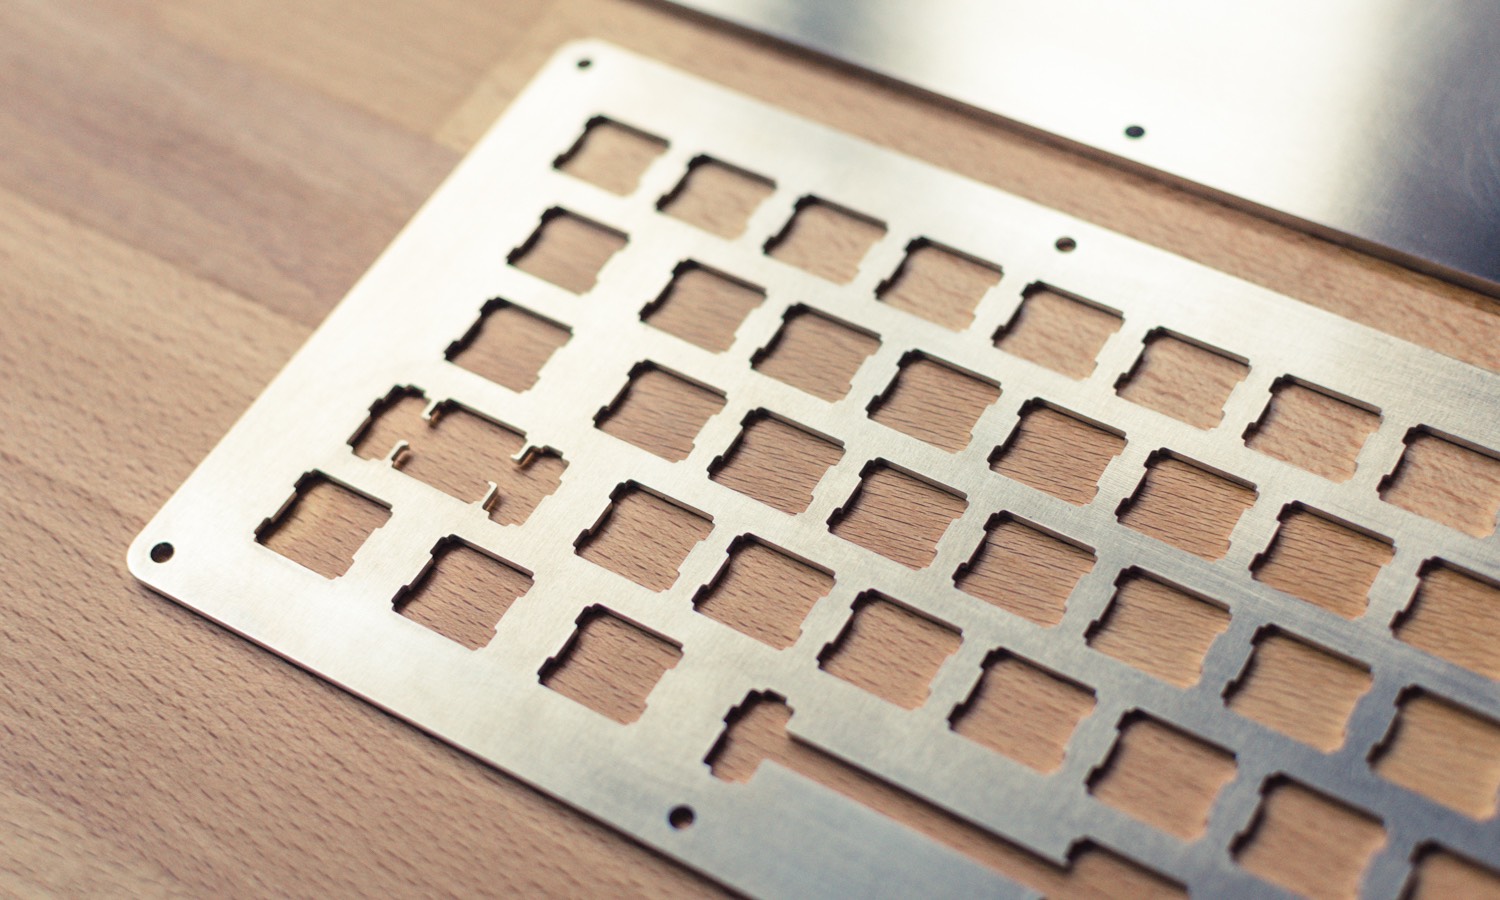
Anodized Aluminium
Raw Aluminium is very sensitive. You might want to anodize the Aluminium plates; either do this by yourself, find a local company, or check if the company that cuts your plates offers this finishing as well.
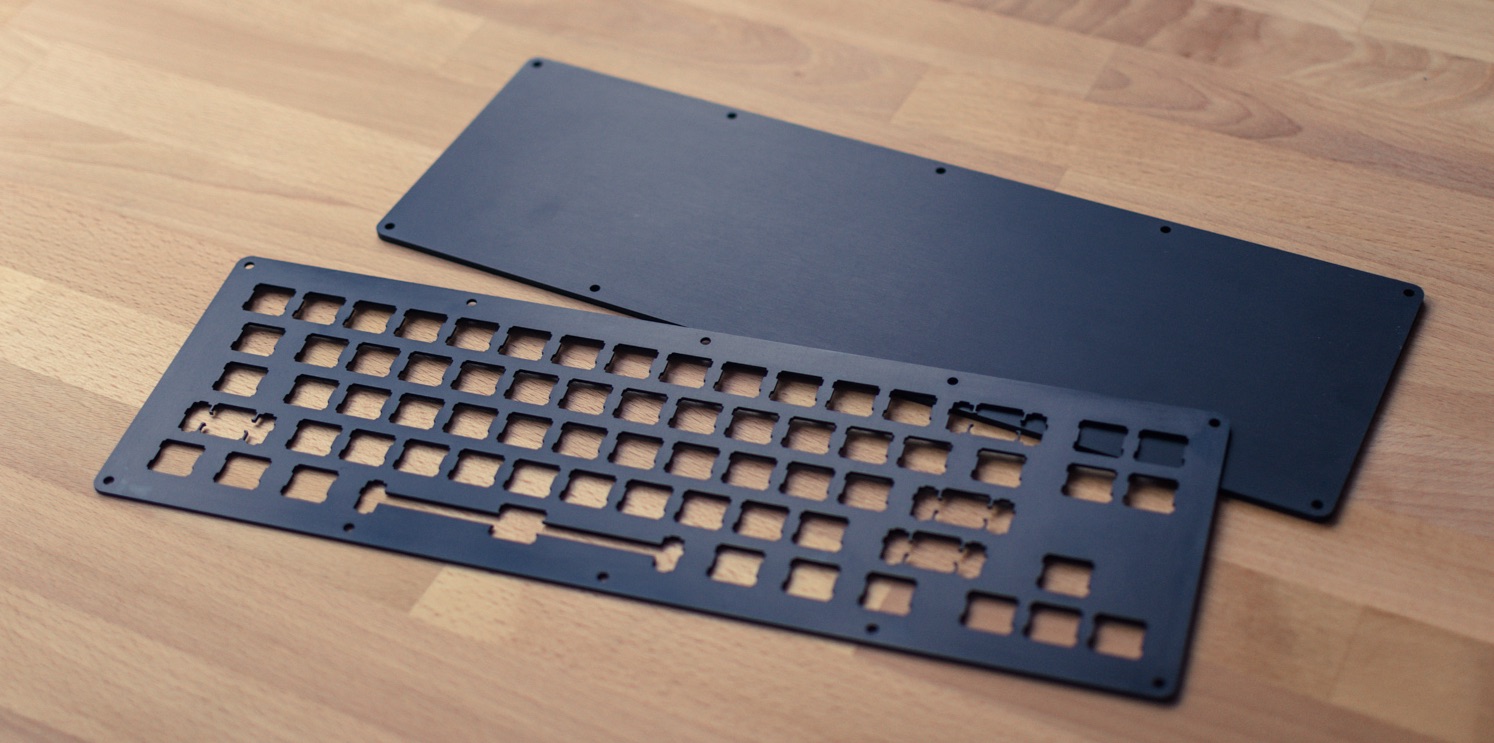
If you are lucky, you might get a good deal with a local vendor. Just call them, and ask for a price offer. Most of the time they handle large orders and may sneak your parts in with another order.
Switches, Stabilizers, and Screws
When your cover plate is ready (either polished or anodized), it’s time to snap in the Stabilizers and Switches. That should be no problem at all, just make sure to start with the stabilizers first.
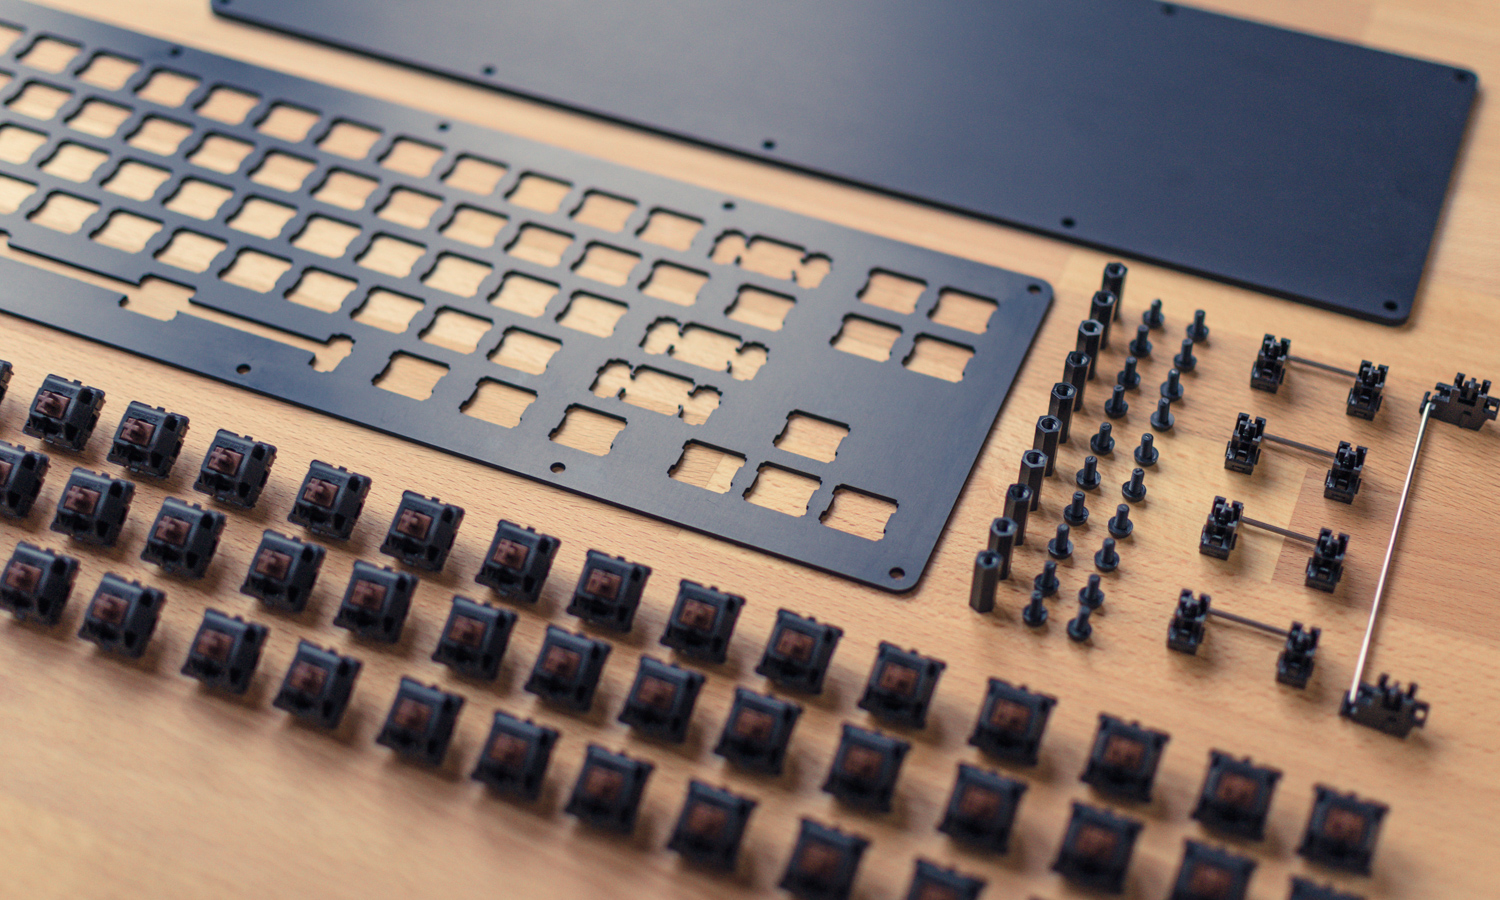
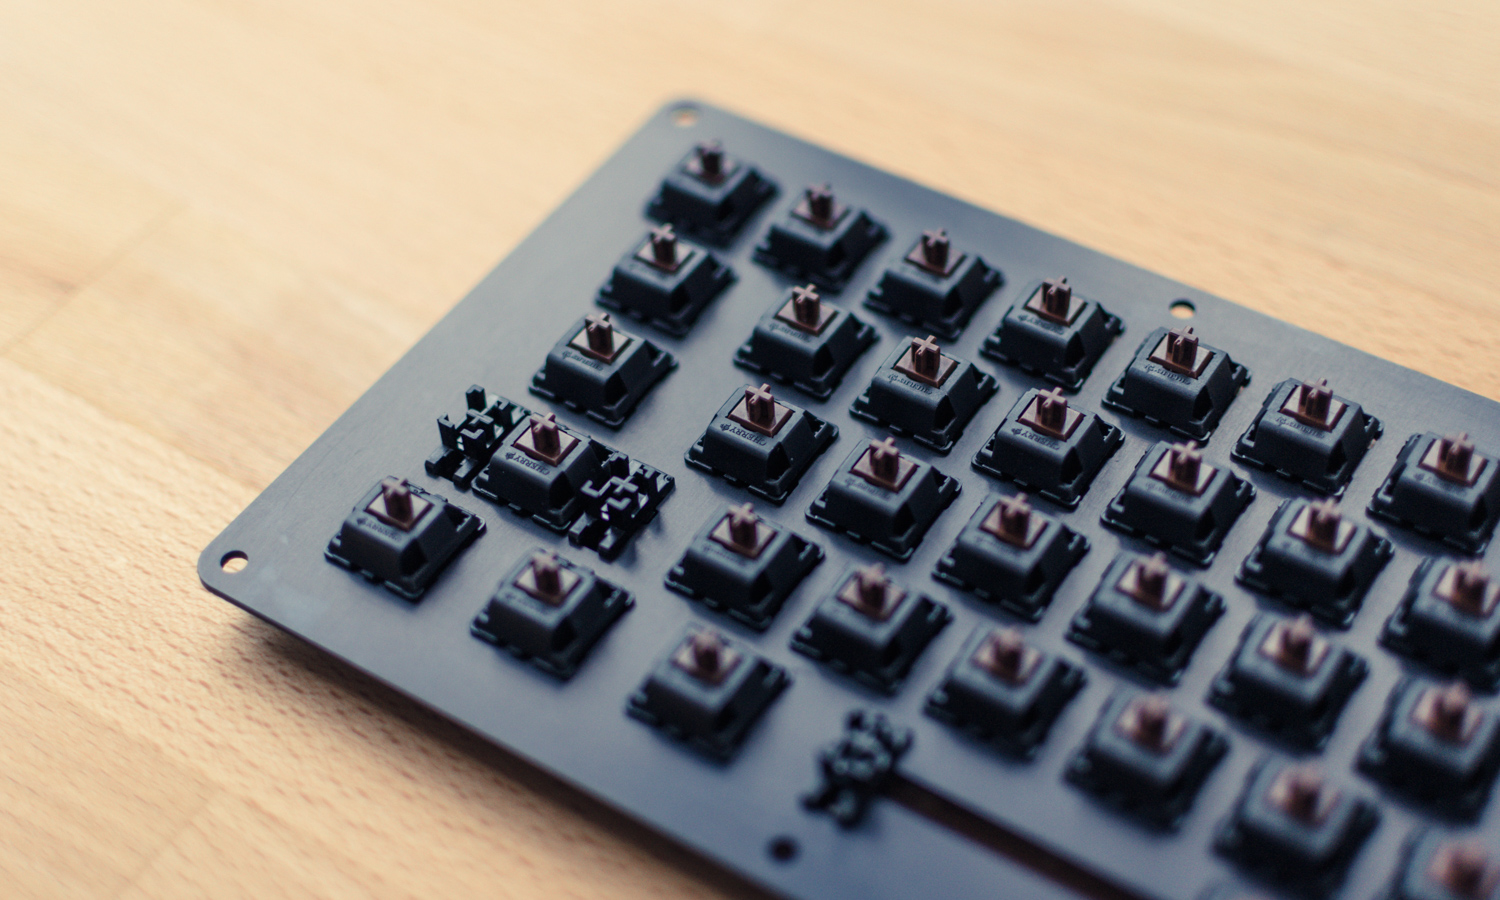
To close the sandwich case, you need common M3 screws and a set of matching standoffs. But you do not need them until you soldered the circuit board to the switches. All in all, you will need four basics in addition to the Aluminium plates:
- M3 Screws, 8mm ( 20x ) 0.99 USD at eBay
- M3 Standoffs, 15mm ( 10x ) 0.99 USD at eBay
- Cherry MX Switches ( 68x ) 14.20 USD at Arrow
- Cherry Stabilizers ( Plate-mounted ) 6.99 USD at eBay
Sometimes it can be hard to find Plate-mounted Cherry-compatible stabilizers. I don’t know why, but most stabilizers are only PCB-mounted. Don’t buy them! Keep digging for the ones that fit into the plate. If you have snapped all Stabilizers and Switches to the plate, it’s time to continue with the Circuit Board!